This DIY project can be completed in an afternoon and makes a thoughtful eco-conscious gift.
This post will cover how to make little zip pouches to hold flatware, chop sticks and a cloth napkin. The instructions for simple mitered-corner napkins can be found here.
About the Fabric
To keep with the spirit of sustainability, I chose recycled canvas for the outside of the pouches in the Flatware To-Go pattern. For the inner lining I opted for an organic cotton in a coordinating Checkerboard pattern. The napkins also used similar fabrics.
Follow manufacturer recommendations for pre-washing the fabric. You may wish to iron the cotton. The canvas won’t need to be ironed, but you may wish to zig-zag stitch or serge around the raw edges to prevent excess fraying.
Notions and Suppies
In addition to the fabric you will need:
Thread to match or complement your fabric. I used a medium brown color for clarity, but you may wish to use a less obvious color.
One 14″ nylon zipper to match or complement your fabric. I love bright zippers that standout and become a design element.
One 3.5″ piece of 1/2″ twill tape or ribbon
Flatware and chopsticks. You can go with bamboo for a truly sustainable kit, but I prefer metal flatware. Second hand stores are also a great resource.
NOTE: Click on any of the photos to enlarge. Click on “x” in upper right corner to close zoomed view.
STEP 1 – Cut bag pieces
Cut one 10 1/2″ x 7 1/5″ piece from recycled canvas for bag outer.
Cut two 10 1/2″ x 4″ pieces from cotton fabric for bag lining.
NOTE: If using the Flatware To-Go fabric pattern, take advantage of it’s block pattern to aid your cut. The outer piece should be 5 squares by 7 squares. Take care when cutting, and you’ll have an easier time aligning your seams for a perfect finish.
Optional
Use a narrow zig-zag stitch along the edge to keep the recycled canvas from fraying.
STEP 2 – Pin to layers to zipper
Layer as follows, aligning long edges:
Outer bag fabric, face up.
Zipper with the pull facing down (toward the outer fabric). The zipper should extend an inch or two beyond the fabrics.
First piece of lining fabric, face down.
Pin all layers together along length of zipper.
STEP 3 – Stitch first zipper seam
Switch to a zipper foot on your sewing machine. Using a 1/4″ seam allowance, sew along layered long side with a straight stitch.
STEP 4 – Repeat step 2
Repeat for the other zipper side. Align outer layer, zipper with pull facing down, and second piece of lining fabric. Pin layers together.
HINT: Start with zipper closed to aid in aligning front and back of bag. Before sewing, open zipper so that the head/pull are clear of stitching area.
STEP 5 – Stitch second zipper seam
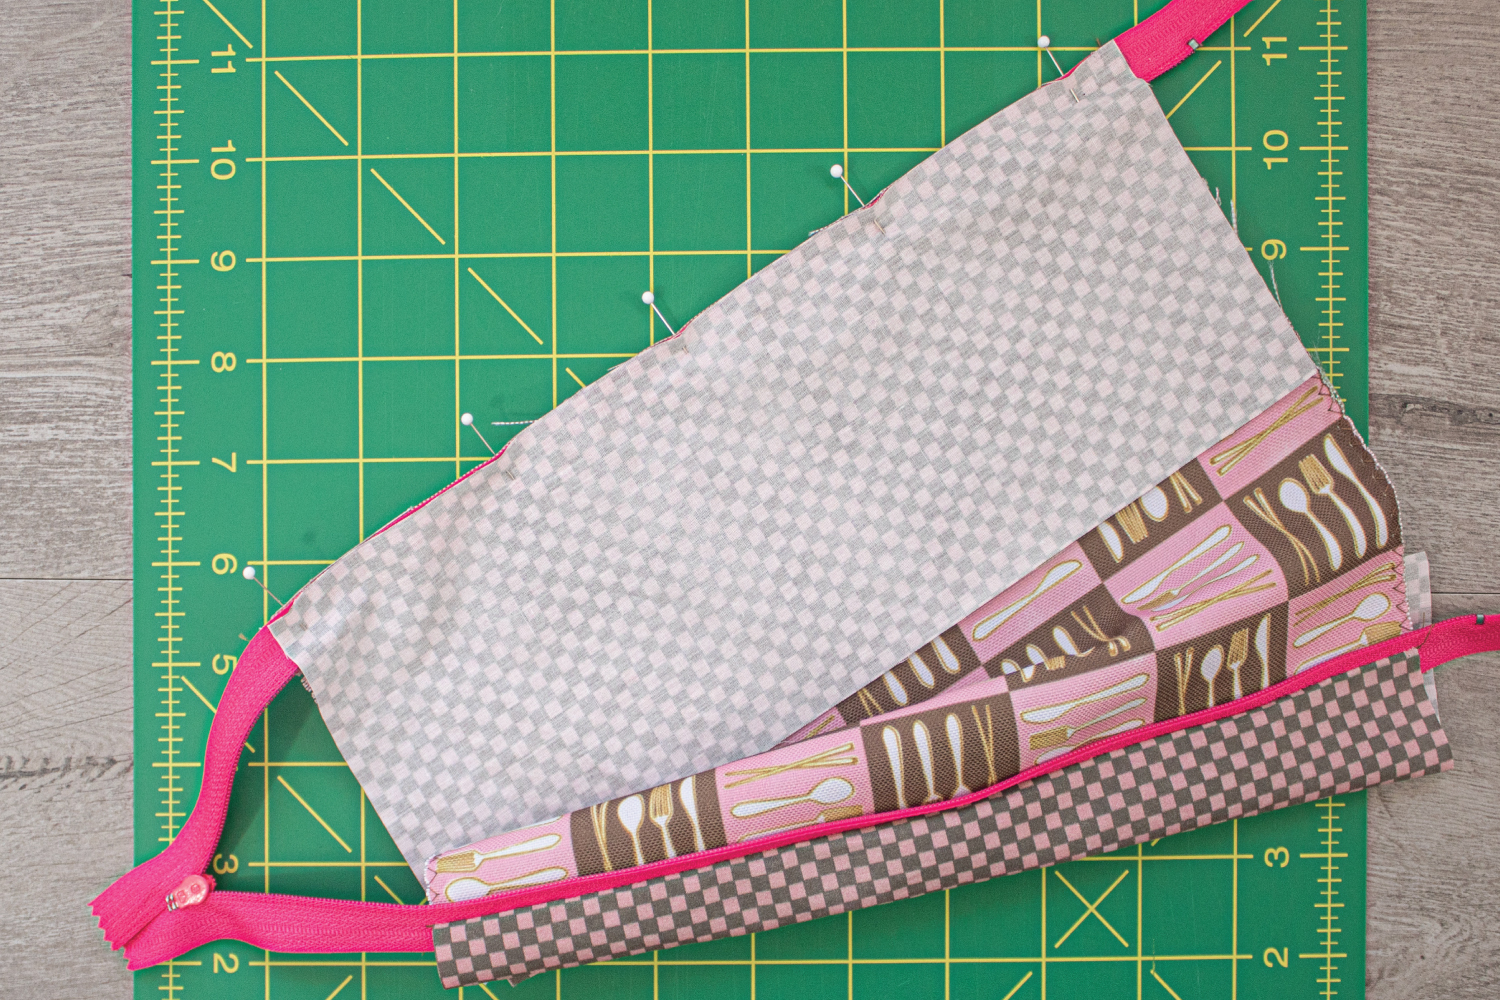
Repeat step 3. The bag will now resemble the above photo when laid flat.
STEP 6 – Turn bag right side out
Open up the seams so that the right sides of the fabric face out.
Fold the lining fabric to the inside of the bag.
NOTE: Normally I would press the seams open at this point, but the zippers I purchased melt too easily. I had to scrape a bit of colorful nylon off the metal plate. So learn from my mistakes. Either finger press, or cautiously find a temperature setting that works for you.
STEP 7 – Top stitch along zipper opening
This is important to your bag construction, as it keeps the lining fabric from interfering with the use of the zipper.
I switched to a clear 1/4″ foot for this step and stitched 1/8″ from edge of fabric.
Pause frequently to make sure your bottom layer is still aligned or, if you prefer, pin or clip the layers prior to beginning.
Repeat for the opposite side.
STEP 8 – Insert twill loop and pin first side seam
Partially close the zipper. You will be working on this closed end first. Fold the bag over with right sides together.
Fold your twill ribbon in half and insert inside bag between zipper layers. The photo above indicates placement.
If using tape with text on it, as I am, make sure it reads correctly as shown here. I messed one up before I paid attention to it. Again, learn from my mistakes.
Take care aligning the zipper, as well as the grid for your outer layer. If you are using the Flatware To-Go fabric, the blocks should align perfectly for a neat seam.
STEP 9 – Stitch side seam
Using a 1/4″ seam allowance, stitch side seam.
There is a lot of bulk at the zipper/twill loop section. Shim the back of the presser foot to assist in getting over this bump. My machine came with this handy tool pictured above, but you can also use a piece folded fabric. Place it under the foot behind the needle when you start over this section.
You may also wish to hand turn the wheel until you are past the thick layers.
STEP 10 – Stitch opposite end
Repeat steps 8 and 9 for opposite end, but make sure zipper is open and omit the twill loop. Again, pay careful attention to alignment of zipper and fabric pattern.
STEP 11 – Trim excess zipper
Carefully trim the excess zipper from both ends.
STEP 12 – Stitch lining bottom seam
Pin and stitch across the bottom lining seam, leaving a 4″ opening in the center for turning.
Use a 1/4″ seam allowance.
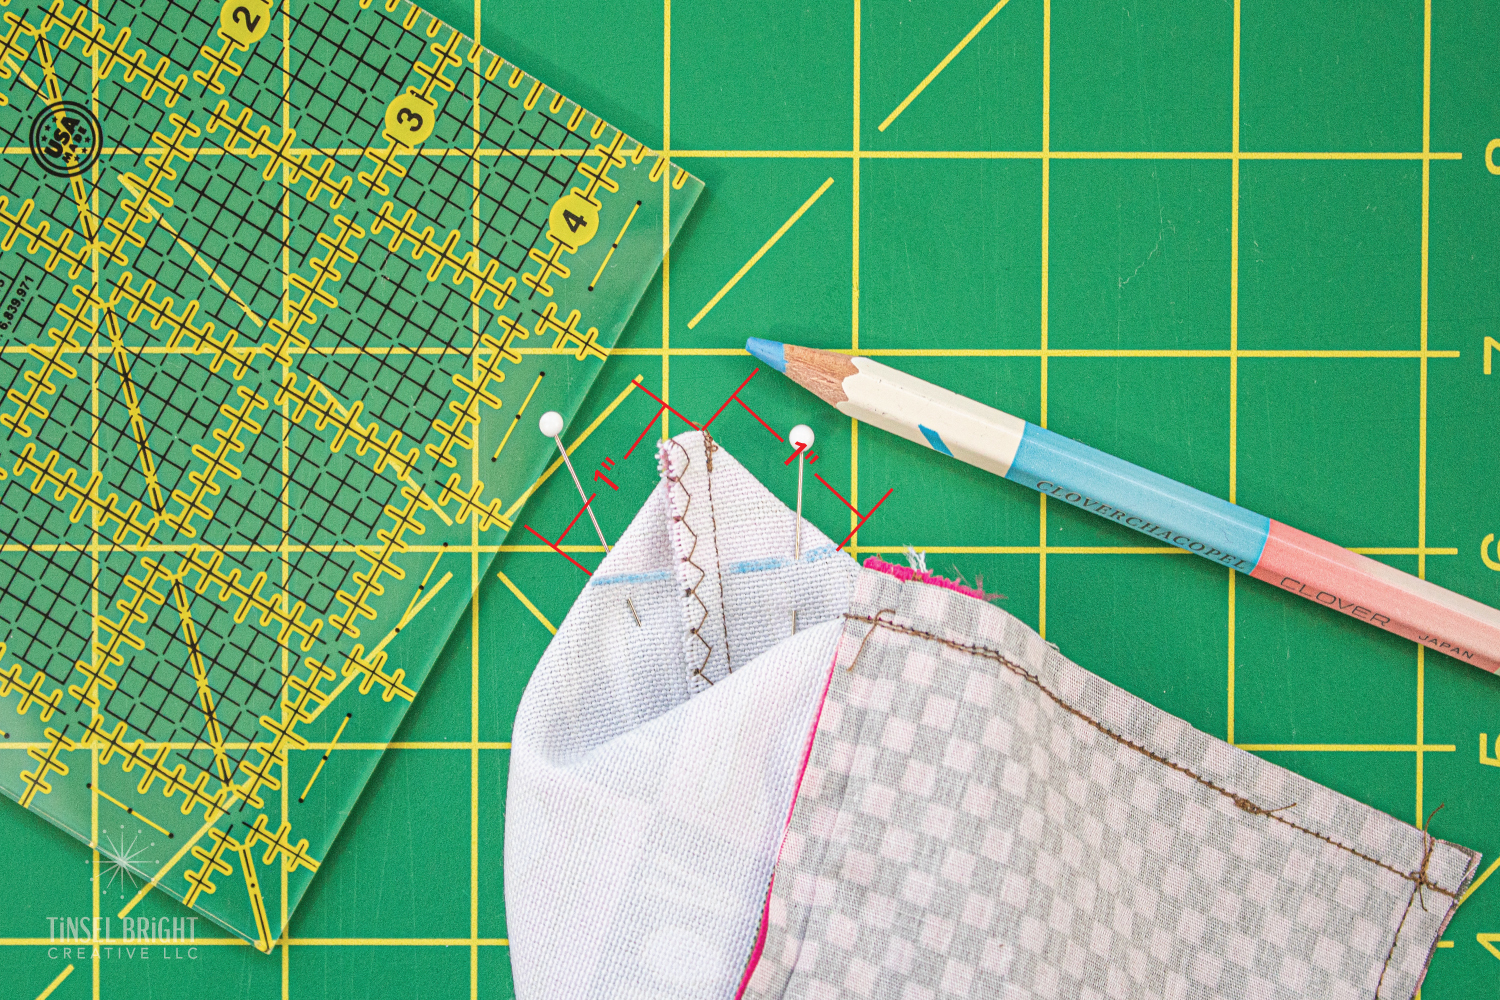
STEP 13 – Pin and mark for box corners
Spread a corner of the outer fabric and fold at an angle so it resembles the image above. Be sure your seam is centered on the fold. Pin to secure.
HINT: If your outer fabric is the Flatware To-Go pattern and you want to be sure the grid is squared up, hold your folded fabric up to a bright light or window so you can see the print. Tweak the alignment as needed.
Measure 1″ from the corner on both sides and mark with a fabric pencil. Connect the marks with a straight line across.
NOTE: The box corner is optional. I like the look and shape of a box corner on my pouches or bags. You can opt to skip to step 15 if you prefer an easier construction or just want a flat pouch.
STEP 14 – Stitch and trim box corner
Stitch along your marked line. Trim off excess, leaving at least 1/4″ of fabric.
Repeat for second outer layer corner.
STEP 15 – Box inside lining corners
Repeat steps 13 and 14 for the lining. Take extra care to make sure the seams align with each other when you fold the corners.
STEP 16 – Turn right side out
Turn your bag right side out through the bottom opening.
STEP 17 – Tuck and pin lining opening
Fold in 1/4″ of fabric along open edges of lining opening. You may wish to press in place. Pin opening closed, placing an extra pin on either end of the opening to indicate start/stop of your stitch line in the next step.
STEP 17 – Stitch lining opening
Using a 1/8″ seam, stitch the lining opening closed between the two end pins. Back tack at beginning and end of seam. Trim excess threads.
STEP 18 – Tuck lining into bag
This is the last step! Tuck your lining into the bag. You are now ready to fill with your flatware, chop sticks and napkin.